QCC-100 Construction
PCB
This section describes how to build up the QCC-100 printed circuit board (PCB).
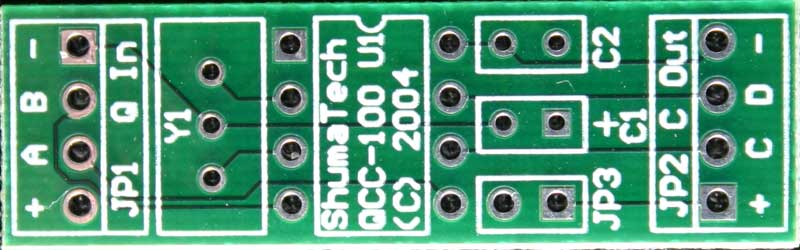
Bare QCC-100 PCB (Click for larger version - 37KB)
Common Construction Steps
|
|
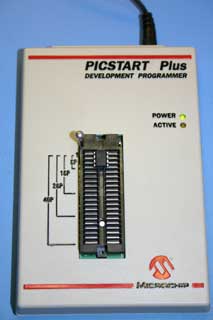
Step 1. Program the PICThe PIC12F629 is programmed before installation into the PCB. There are several programmers available to do this job. The programmer pictured on the left is the PICStart Plus available from Microchip, the manufacturer of the PIC. There are several low cost programmers available under $20 such as the JDM or the El Cheapo. Spark Fun is a good place to get a low cost JDM programmer. Use the HEX file available on the software page to program the PIC with the programmer and its associated software. Make sure the software verifies the programming before proceeding with construction. |
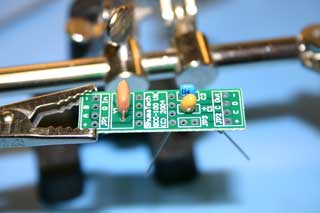 |
Step 2. Install the capacitors and resonatorCapacitor C1 is a 10uF tantalum capacitor and is polarized. The capcitor will have a bar or + mark above the lead that is positive. Install the capcitor so the positive lead is in the hole in the PCB that has a + mark next to it. Spread the legs apart on the solder side so that it does not fall out during soldering. Capacitor C2 is a 0.1uF ceramic capacitor and does not have polarity. Install it in either orientation and spread its legs apart on the solder side. The ceramic resonator Y1 also does not have polarity and can be installed in either orientation. Tack solder one of the legs from the component side so that it does no fall out. Flip the PCB over to the solder side and solder all of the leads to the PCB. Clip the leads with diagnoal cutter as close to the solder as possible but be careful not to damage or crack the solder joint. |
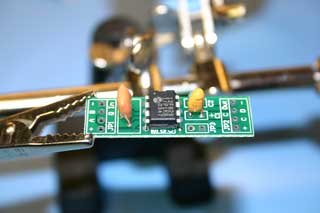 |
Step 3. Install the PICInsert the PIC into the PCB with the notch in the package matching the notch shown on the PCB silkscreen. Tack solder one lead to prevent it from falling out. Flip the PCB over and solder the rest of the leads. |
From this point, you can make either version of the QCC-100, either internal or dongle. Follow one of the following sets of construction steps to build the desired version.