LCD-200 Construction
Step 9. Solder the Switches
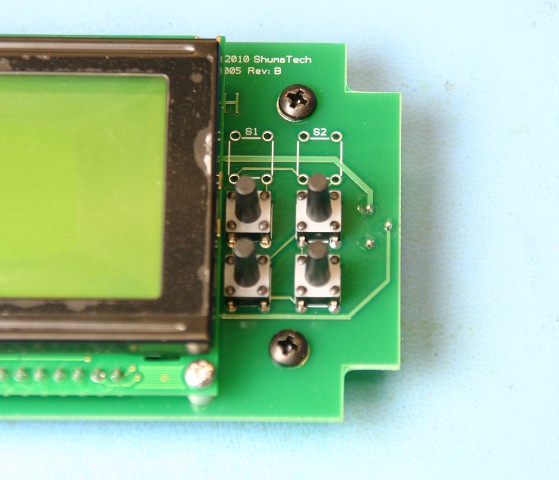
Retrieve the four switches set aside in step 3. Insert them through the four bottom positions S3 through S6 on the LCD side of the board. Don't worry about positions S1 and S2. They are not populated with switches and are just extras that might be used some day on a different version of the LCD-200. Make sure the back side of the switches are flush against the board and then solder them in from the other side of the board.