LCD-200 Construction
Step 3. Solder SD Card Connector
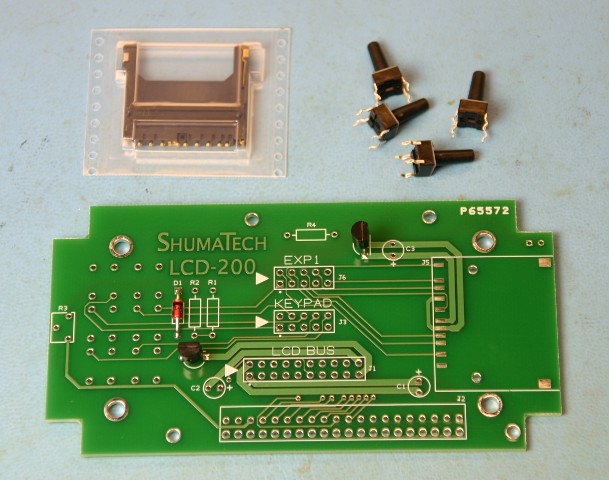
Next we will solder the SD memory card connector. It is a surface mount part but don't worry, it's not any harder to solder than any other part. It just takes a slightly different technique. Empty parts bag #4 out and remove the connector from its plastic holder. You can set the four switches aside by the LED since we will install them later on.
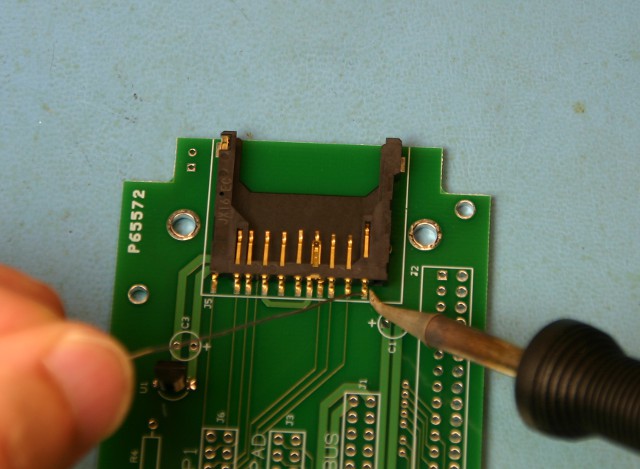
Lay the board flat in front of you and place the SD connector on its position on the right. Notice that it has two black pegs underneath that should engage into the holes in the board to keep it from sliding around. Once it's in place you can solder each of the surface mount pads. The best technique to use is to touch the iron to the side of the pin and apply solder to the junction between the soldering iron and the pin. Solder should flow down and cover the pin and secure it to the pad. Be careful not to use too much solder since most people's tendency is to use way too much solder. It is a good idea to use solder wick to suck up most of the excess solder.

Finish the rest of the pads the same way. Inspect the pads to make sure that there is no solder bridging two adjacent pads together. Again, it's good to use solder wick to suck all but a very small amount of solder on each pad.